Showing posts with label recipe. Show all posts

Thursday, September 24, 2015

Mulberry Crumble Recipe

660 grams of Mulberries
Much more delicious than they look!

Hooray! It's Mulberry season! And the tree we planted in our back yard a few years ago is bowing under the weight of it's delicious fruity covering. I  have been picking the berries daily, eating them for breakfast, leaving a bowl out in the kitchen (so that as a result my children are often sporting berry stained faces and fingers), sharing them with friends, and stashing some in the freezer. Yesterday I had an especially fruitful forage (see what I did there?) and had an excess of Mulberries. Oh, how rich I feel to have not only an excess of Strawberries, but Mulberries too. I've been craving thinking about Crumble since the first Mulberry turned from green to deep purple. Yesterday my friend celebrated her birthday, so what better excuse to make Crumble? One for her and one for me us.

You can make this simple deliciousness with almost any fruit that you are rich in. I'm thinking of making another with Mulberries AND Strawberries. I know, yum...


Mulberry Crumble Recipe 

(makes one thick crumble, or two thinner ones as pictured.)

500 grams of Mulberries (more or less)
2/3 cup of sugar
1 cup plain flour
1/2 cup soft brown sugar
3/4 teaspoon ground cinnamon
100 grams of butter (I use Nuttelex for a dairy free version)

Preheat oven to 180 degrees.

Rinse berries and pinch off the green stems, pop in a large saucepan with the white sugar. Stir over low heat until the sugar has dissolved (which smells awesome), then cover and simmer for ten minutes, or until berries are soft but chunky. 

Spoon in to an oven proof dish.

Combine flour, brown sugar and cinnamon in a bowl, rub in butter with your finger tips. Sprinkle over berries and liquid. 

Bake for 25 minutes, or until topping is golden brown.

-

Enjoy with custard, yoghurt or ice cream. Or just straight from the oven....


Tip - if you have excess Mulberries that you want to freeze, but you don't want them all to stick together, wash them and pinch off the green stems, lay them on a baking dish with baking paper (or aluminium foil if you have run out) and pop them in the freezer. When they are frozen you can bag them up like berry ice cubes in resealable bags. 

Thursday, November 27, 2014

Salmon and Spinach Pasta for the Spirit


I read recently that the times you need to slow down the most, are the times when you don't have time to do so. The concept struck it's mark with me and most likely resonates with you too. I had been feeling overwhelmed by my to do list, the fridge full of invitations, the calender scribbled with events, the list of custom work on the whiteboard. I realised that the only way I could keep all the plates spinning was by taking time out for myself and not exchanging food preparation time with bench time. So I have committed to a weekly yoga class (bliss!) and am making more effort in the kitchen.

I have a bad habit on bench days of running upstairs to eat lunch while the children sleep, and resorting to a cup of two minute noodles before heading down to the bench again. Yesterday I made myself this beautiful pasta instead, which took an extra ten minutes, but was delicious and satisfying and good for my spirit. It's funny how we change as we grow - five years ago I ate neither spinach nor salmon, and now they are two of my favourite foods!

Makes two servings.

Salmon and Spinach Pasta

A handful of tubular Spaghetti (or whatever you've got)
1/2 lemon - juiced
A spoon full of sun dried tomatoes
A spoon full of capers
A spoon full of sliced black olives (or whatever else you love)
Two handfuls of baby spinach leaves (and/or rocket leaves)
A tin of roasted salmon in springwater
Olive oil

Boil water with a pinch of salt and add pasta. Cook until al dente and drain all but a quarter of a cup of water. Return to low heat and add lemon juice, tomatoes, capers, olives, spinach leaves, salmon and a sprinkle of olive oil. Stir through over low heat until spinach has wilted.

Serve and enjoy!

Simple, delicious and filling for lunch or dinner.

Wednesday, October 29, 2014

No Cook Playdough


How good is play dough? For my five and two year old, it is the best. They spend hours using household items, their hands and imaginations to create everything from people wearing dinosaur shirts (as above) to angry birds being bombed with sling shots. Seriously. (And while the second is not exactly my choice of play inspiration, who am I to argue with the creativity of my big boy?)

Even more exciting for my two was the fact that they were able to make our latest batch of play dough all by themselves. From measuring to stirring, colouring to kneading, together they carried out the simple instructions. And they really are very simple.

You will need -

2 cups of plain flour
1 cup of salt
1 tablespoon of oil
1 cup of water
Food colouring

Mix flour and salt together. Mix in oil, water and food colouring, then knead.

Ta-dah!

Thursday, October 9, 2014

Mulberry Jam - A simple recipe


The mulberries soaking in the sugar, and the mulberries cooking.

Almost three years ago I planted a mulberry tree next to our shed. At that stage it was little more than a twig with two leaves on it. It was difficult to imagine that in three short years it's branches would be so heavy with fruit that I would happily allow the birds to take their fill and still be filling a colander with fruit each day. I feel rich with fruit! And to celebrate I have been sharing it with my neighbours, freezing it for when the tree is exhausted and turning my hand to jam making. 

I've attempted Mulberry jam in the past with limited success. My first batch wouldn't set and jars and jars of runny jam went to waste. My second batch I overcooked in an effort to right the wrongs of my first batch. This time the contents of my jars was something like a fruit toffee, though less edible. This week though I found satisfaction! I cooked a batch of jam that made me proud and which has been covering muffins and crumpets ever since.

Where I had been going wrong was trying to cook Mulberry jam the same way I cook Strawberry jam. But Mulberries are thicker, denser and need more cooking time. Cooking in smaller batches also seems like the best way to go. I've written down my steps for future reference, and for anyone else interested in making their own jam. I learnt to make jam after a whole lot of googling, and tips from Rhonda at Down to Earth blog.

You will need -

800 grams Mulberries
800 grams white sugar
3 tablespoons of lemon juice
Scales
Stock pot
Wooden Spoon
Teaspoon
Tongs 
Jam jars
Funnel
Measuring cup

Wash the fruit and twist the stems from the top - you can pinch them off too, but this hurts your fingers after awhile.
Weigh your Mulberries and sugar, you want about the same amount of fruit as sugar, though you can try using a little less sugar.
Place fruit in your biggest saucepan - I use a stock pot - and cover with sugar. Mix and leave for an hour.

Meanwhile, wash up your jam jars and heat your oven up on to a low heat (80 degrees) and place jars inside to sterilise them. Place a saucepan in the freezer.
Add lemon juice to fruit and sugar, bring to the boil while mixing.
Allow mixture to bubble up and skim the foam off the top.
Turn down to a rolling boil and keep stirring so the jam doesn't burn or stick to the bottom of the pan. Cook for approx. 20 minutes, or until mixture seems less runny.

Take a teaspoon of the liquid mixture and drip it across the plate from the freezer. This cools the boiling liquid so you can see if the jam has 'set' or not. This step confused me at first. I wasn't sure how to tell if it has set or not. What you are looking for is for your drips to behave like store brought jam. So when you push your fingernail through the drip, the mixture should part and not run back together again. If it does, keep cooking and try again in another ten minutes. If the mixture bunches up and stays separated, it has set and you need to turn the heat off.

Using your tongs to remove the jars from the oven and place the funnel in the mouth of one of the jars. I use a measuring cup with a lip to scoop up the jam mixture and pour it in to the jar. Be careful, it's hot! And hot jam burns! Leave a couple of centimeters room at the top of the jar.
Pop on your lids, turn the jars upside and leave them to cool and they are ready to eat.
If you aren't going to eat them straight away, and you want to store the jam for up to twelve months, you will need to use a water bath method to kill any bacteria in the jar.

Wash out your stock pot and fill it up half way with hot water. Bring it to the boil with a tea towel in the bottom. Place the jars in on top of the tea towel - this helps to avoid them from breaking or cracking on the bottom of the pan - making sure they are covered with water and bring the water back up to the boil and leave it to boil for about an hour.
Remove jars with tongs and let cool overnight.
Store in a dark, cool cupboard for up to a year.

Happy jam making!

Friday, December 20, 2013

Rocky Road Recipe - Christmas Baking

+
+
+
+
+
+

I remember while growing up that one of our Christmas traditions was to make Rocky Road with my Mother. A treat for the family, a gift for teachers, neighbours and friends. I always knew it was nearly Christmas when the fridge was full of Rocky Road, Rum balls and stone fruit. 

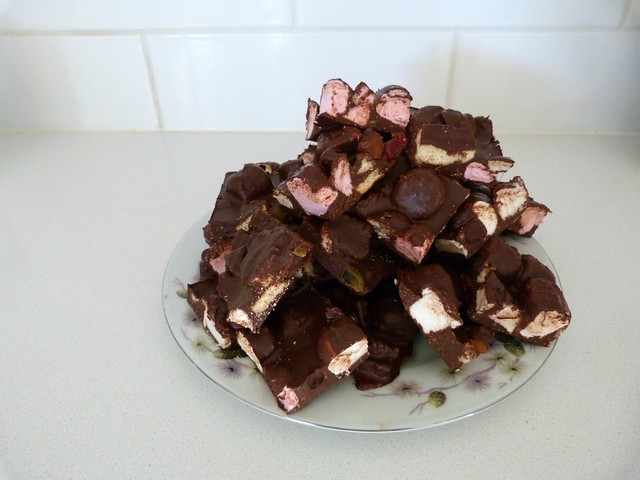
It has been years since I made Rocky Road. Have you ever made it? It's simple, quick and too yummy. I made a nut and dairy free version this year, so the children and I could eat it too. Cohen and Emerson are still a bit little to help too much with this recipe, due to the warm chocolate, but I think it would be great for older children. They did however lick the spoon and sample the lollies.

You will need:

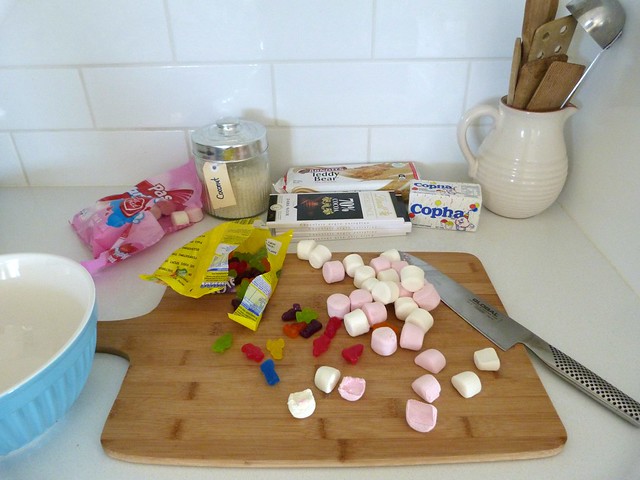
1/2 cup of desiccated coconut
1/2 cup of broken up biscuits of your choice ( I used 'Teddy Bear' biscuits)
4 x 100 gram Lindt 70% Cocoa dark chocolate (which is diary free)
1 x packet of 250g marshmallows
1 x packet of lollies of your choice (I used Starburst Babies)
30 grams of copha

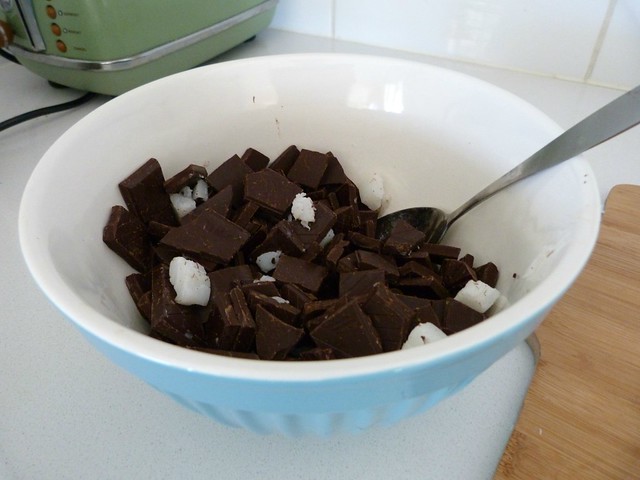
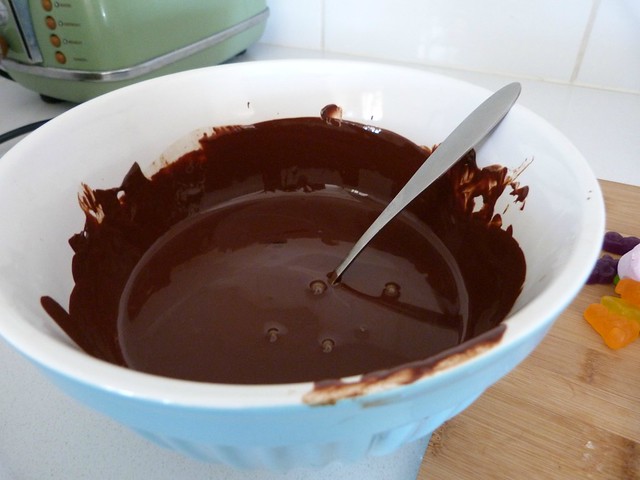
Break chocolate in to pieces in a microwave safe bowl. Chop up copha finely and mix through the chocolate. Melt together on medium in the microwave, checking and stirring with a spoon a minute at a time. This takes 2 - 3 minutes.

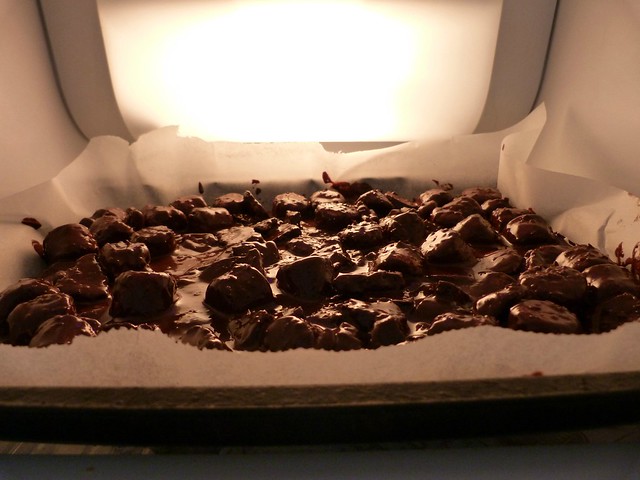
Stir in the coconut, marshmallows, biscuits and lollies. Tip the mixture in to a lamington tin lined with baking paper. Smooth out and refrigerate for approx. two hours, until firm, then cut in to squares with a sharp knife. Try to resist eating too much...

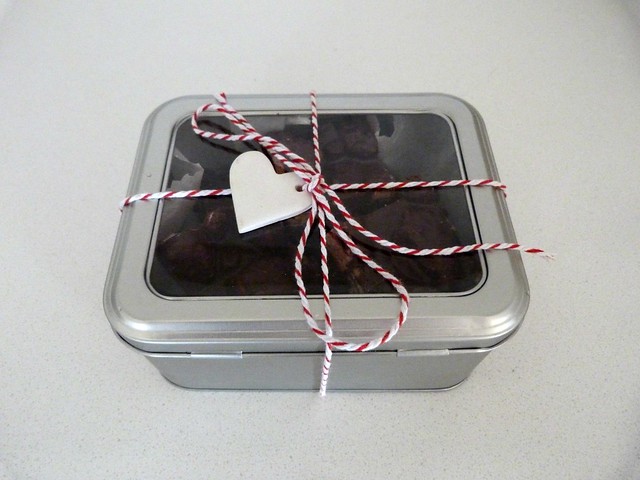
To make a lovely gift, find an interesting box or a pretty tin and line it with baking paper, fill it with Rocky Road and add a few fun touches. Perhaps decorations or gift tags made by your children? Some stripes of washi tape? Or maybe cellophane and ribbon? The team at Pack Queen provided me with a funky window tin. Perfect for gifting Christmas treats, and a nice size for future use for the receiver. I lined mine with baking paper, cut off the excess paper with pinking shears and tied it with bakers twine and added a small air dry clay heart.

A perfectly sweet Christmas gift!

Monday, February 25, 2013

Tea, friendship and a recipe

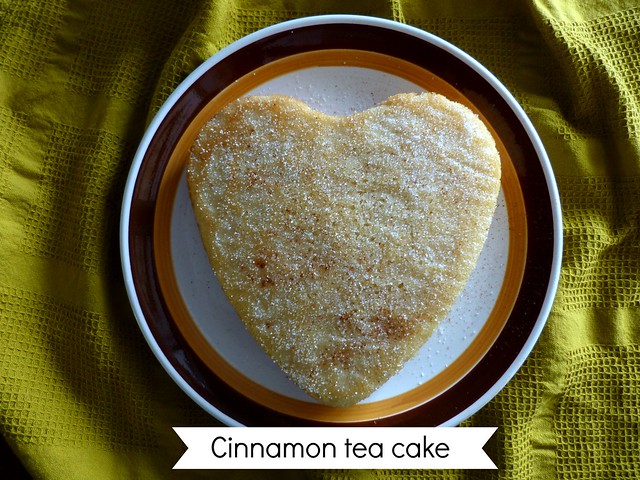
cinnamon tea cake

A cup of tea and a friend can really do wonders for ones mood. I must admit, the confines of recovery have been getting to me. The children have had cabin fever. Emerson is teething and Cohen is testing his boundaries, as four year olds are want to do. I've not felt myself and have been unable to shake the feeling. I've felt I should be doing 'something', though I'm uncertain as to what that 'something' may be. There is much I am still unable to do. Despite the many positives, it's been frustrating.

Sitting around the kitchen table with an old friend this morning, we chatted in that interrupted manner that mothers become accustomed to. Sentences hang midair while meeting a child's needs. Threads of conversation are lost or picked up again eventually. Dreams, stories, hopes, successes and failures are shared. The words flow. Gifts were exchanged. And there is that ease you develop with some people where, no matter how long it has been since last you saw them, you pick right up where you left off.

I noticed something this morning. As we discussed our children, our gardens, our crafting, our renovations. The contentment that I feel at home overcame the resentment that I've had at not being able to drive. The excitement I felt about our renovations, which waned with the eye surgery and recovery, reappeared. I felt my sense of self seeping back in. My passions reawakened. I felt a renewed surge of possibility. That I could be more patient and more grateful. That I could make the most of this time.

And I thought how wonderful friendships and tea are.

-

I made this cake in anticipation of her visit. It smelt so good when it came out of the oven yesterday that Cohen and I just had to try it. I did manage to save some for today. I made it dairy free, as I am lactose intolerant, but you needn't. I will be making it again quite soon, as it was moist, fluffy and yummy!

Cinnamon Tea Cake

60 grams butter (I use Nuttelex with Olive oil)
1/2 cup sugar
1 egg lightly beaten
1 teaspoon vanilla essence
3/4 cup self raising flour
3 tablespoons plain flour
1/2 cup milk (I use soy milk)

+ a tablespoon of melted butter
half a tablespoon of sugar and
half a teaspoon of ground cinnamon mixed together

Pre-heat oven to 180 degrees celcius (350 degrees F)
Grease and line the base of a cake tin with baking paper

Beat butter and sugar until light and creamy. (I use an old mix master)
Add egg gradually while still beating, then beat in vanilla.
Add sifted flour and milk and fold in with a spoon until just mixed and smooth.
Pour in to tin and smooth top.

Bake for 30 mins, then check with skewer. (Edges should be lightly crispy and skewer should come out clean, though cake may look under cooked.)
Let cool a few minutes before inverting on a wire tray.
Brush with melted butter and sprinkle sugar and cinnamon mix over the top.

Pour a cup of tea or coffee and share with a friend.
Enjoy!

Monday, June 18, 2012

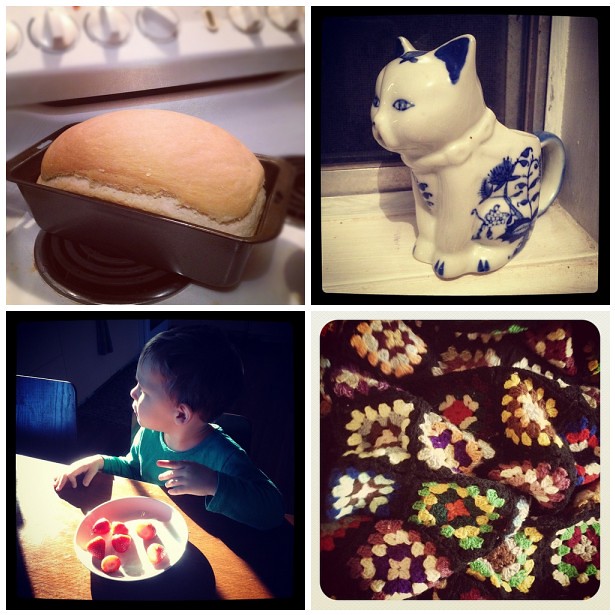
Weekending

Weekending

Weekending
Weekending

Today I shall be taking a jar of jam to the neighbours and explaining the screaming they no doubt heard last night.

I made my very first mandarin jam yesterday, with a dozen mandarins from our neighbours tree. It was much more time consuming than I had anticipated. I doubled this recipe but only used the rind from three mandarins and two lemons. Peeling the skins, removing the membranes and seeds, then chopping a dozen mandarins is a lengthy process. Especially when baking bread, fixing dinner, supervising baths and nursing a baby along the way. Luckily my husband makes a rather wonderful, if somewhat impatient, stand-in pot stirrer. The results though are seven jars of beautiful jam, containing nothing but mandarins, lemons, rind, water and sugar. One jar saved especially as a thank you to our wonderful neighbours.

Possums are determined little creatures. We have one such little Brushtailed friend fiend who keeps managing to wiggle his way in to our garage despite our best efforts. Last night, after we presumed he had vacated the cavity beneath the bath to partake in his usual night time ramblings, we affixed a plank of wood over his garage entrance route. Determined to keep him outside for good this time. To my dismay, he was late in leaving his bath place abode, and at 10pm could be heard trying his usual exits in the garage to no avail. The possum proofing was working, except that the possum was trapped inside. My jam was cooling and my husband was sleeping and things were going bump downstairs. What to do. I woke my husband, who showed little interest in getting out of our warm bed. I cajoled him into coming down stairs with me and I grabbed the broom just in case.

This in turn lead to my bemused husband watching on as I chased said possum around the ceiling joists downstairs with the broom. He was supposed to be helping me. Apparently he was tired. So, I have a broom, the possum is running over the open garage door, then darting back inside and I am trying to shoo him out again. As you can imagine, my husband was even more amused when our dear possum unexpectedly launched himself at me. Flying through the air, possum paws outstretched, he landing on my jeans and foot. And I, well, I would like to say I remained calm and saw him on his way outside and calmly brushed my hands together in an 'that's the end of that' fashion. But, as you will no doubt have guessed, I screamed. Then did a little screaming-jumping-up-and-down-shaking-my-hands-get-it-off-me-get-it-off-me dance. Which I'm not proud of, but which had the desired effect. The poor possum ran, leaving me with two nice scratches on my foot in the process, but finally scampering out of the open garage door. My husband laughed all the way back to bed as I repeated several times in a shocked, high pitched sort of way, "Did you see that? It jumped on me? It JUMPED ON ME!"

I lay away half the night listening for tell tale bumps and scratches. Now I'm off to reapply some antiseptic and visit the neighbours with jam and explanations. And perhaps nap this afternoon...

How was your weekend?

Friday, March 5, 2010

ANZAC biscuit recipe...

I love ANZAC biscuits. I remember my mother making them for us as children.

It is also a great biscuit recipe for children, who like Cohen, have allergies or intolerance's to egg and dairy.

I usually double this recipe, bake them all and freeze half for later.

ANZAC biscuits

1 cup of plain flour
2/3 cup of sugar
1 cup of rolled oats
1 cup of desiccated coconut
120g of dairy free margarine (or butter)
1/4 cup of golden syrup (or honey)
1/2 teaspoon bicarbonate soda
1 tablespoon warm water

Preheat oven to 180'C (350'F) and line two baking trays with baking paper.

In a large mixing bowl sift the flour and sugar. Add the rolled oats and coconut and stir.

Melt the margarine in a saucepan on the stove and mix in the golden syrup with a spoon. Dissolve the bicarb soda in the warm water and add to the margarine and syrup mixture. It should foam up instantly and turn the entire mixture into foam. If it doesn't dissolve a little more bicarb soda in water and add to the mixture.

Pour syrup mixture over dry ingredients and combine. Roll tablespoon sizes of the biscuit dough into balls and flatten with your hands before placing onto baking trays. The biscuits will not spread as much during cooking when using dairy free margarine's, but still leave at least half and inch between biscuits.

Bake for ten minutes, or until the biscuits have started to turn brown. This produces a softer, chewy biscuit. If you prefer firmer biscuits, continue cooking for another five minutes.

Remove tray from oven, allow to stand for a few minutes before transferring to a wire rack to cool completely.
Related Posts Plugin for WordPress, Blogger...