Friday, May 31, 2013

$4 Wall Art DIY

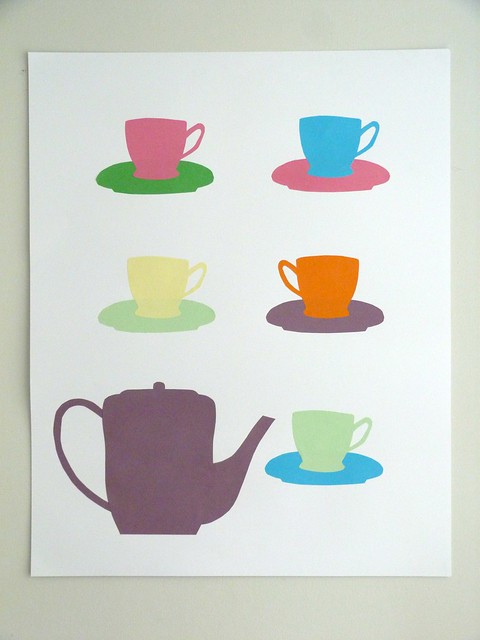
I've been working on a simple, colourful DIY art work for our dining room this morning. I'm so pleased with how it has turned out! I wanted something quick and in-keeping with our space. Not too precious, but fun and handmade. I had been looking at framed screen prints for this wall, but there wasn't room in our budget after our kitchen renovations. Instead I came up with a thrifty alternative using cut coloured paper, which gives a similar look, for the sum total of $4!

I decided on a tea theme, but you could really make this your own with any sort of silhouette or design. (We've had a rainy, overcast morning, so I apologise for the washed out photos.)

$4 wall art DIY
$4 wall art DIY

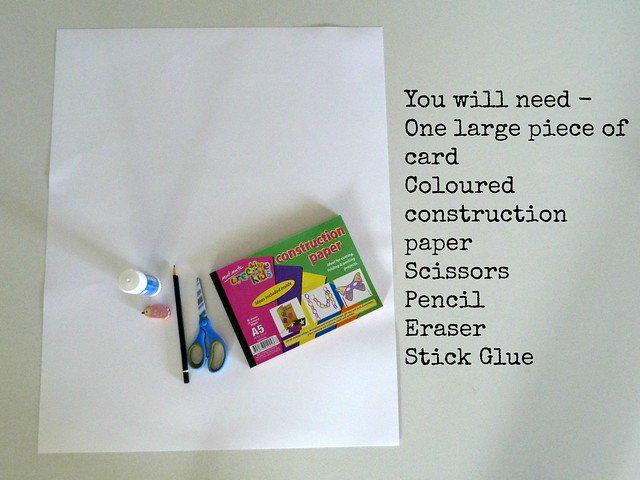
I picked up the large piece of white paper at a news agency for $1, and the book of coloured construction paper from a discount variety store for $3. Alternatively, you could buy the paper in individual sheets from the news agency for about 50 cents an A4 sheet. You could also use scrap book paper or recycle printed paper - like maps or sheet music.

$4 wall art DIY

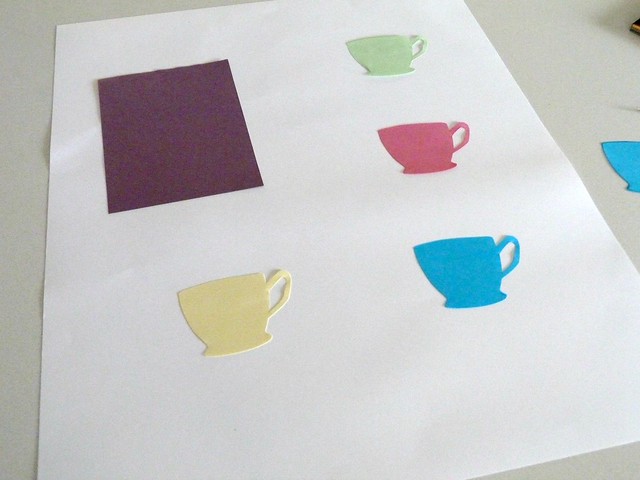
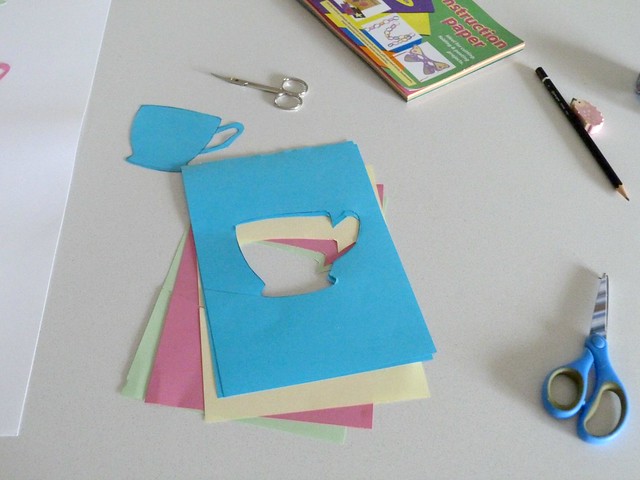
Sketch out your design on a spare piece of paper, lay it over the top of a few pieces of your chosen construction paper and cut out the design. This saves time, as you don't need to trace out the design several times, and keeps the shapes uniform. If you aren't confidant about drawing your own design look for simple shapes you can trace from children's drawing books and magazines, or Google silhouettes of your desired shape and print them out.

$4 wall art DIY

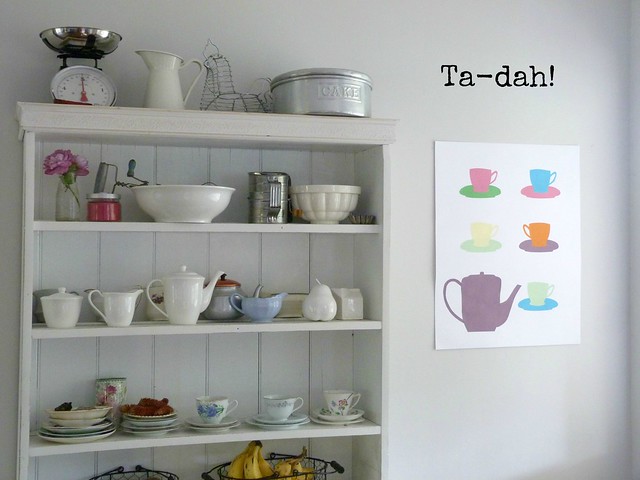
Play with the colour and layout until you are happy with the result. Initially, I had in mind to create a tea pot and four cups. After cutting and playing, my outcome was quite different, and I added an extra cup and saucers to the overall design.

$4 wall art DIY

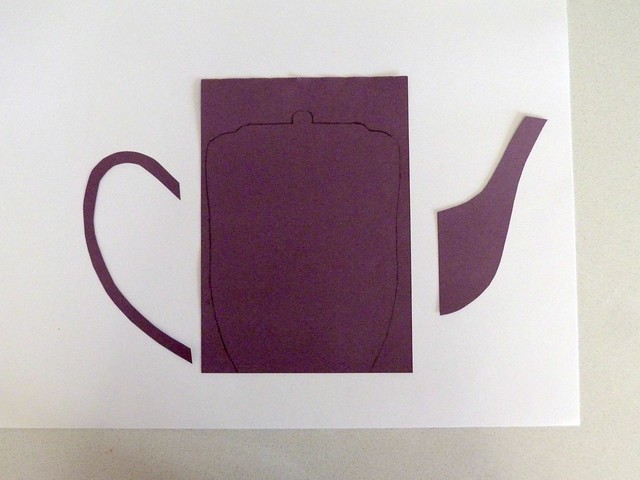
You aren't limited by the size of your paper. To create the tea pot I cut the components separately and tucked the handle and spout under the body of the tea pot when I stuck it down.

Stick down all your pieces, grab some blu-tac and hang your masterpiece.

Stand back and admire it!

$4 wall art DIY

When the budget allows I intend to frame my DIY art work. I'm also thinking of adding some floral designs to the cups and teapot using a white pen. In the meantime I have some colouring in to do with my little ones. 

If you have a go at making your own cut paper wall art I would love to see! 
If you like this tutorial, why not pin it? :)

Wednesday, May 29, 2013

A thrifty deck makeover

+
+
+
+
+
+
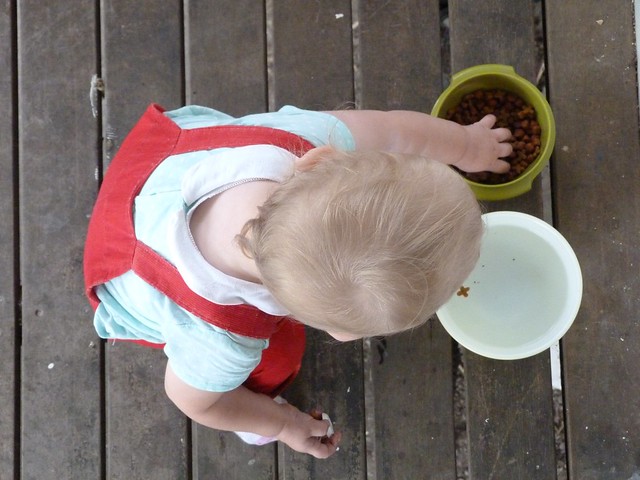
My little helper investigates the kitty food by the back door.

While the tradies came and went, working on the kitchen, the back deck became something of a dumping ground. Suddenly home to off cuts, bags of grout, piles of tools and a layer of plaster dust. Not very inviting, I can assure you. Once the kitchen was finished our poor deck and chairs looked a little worse for wear. While we have bigger plans for this space in the future, our budget has been well and truly been spent on the kitchen. So, I decided a thrifty makeover was in order,

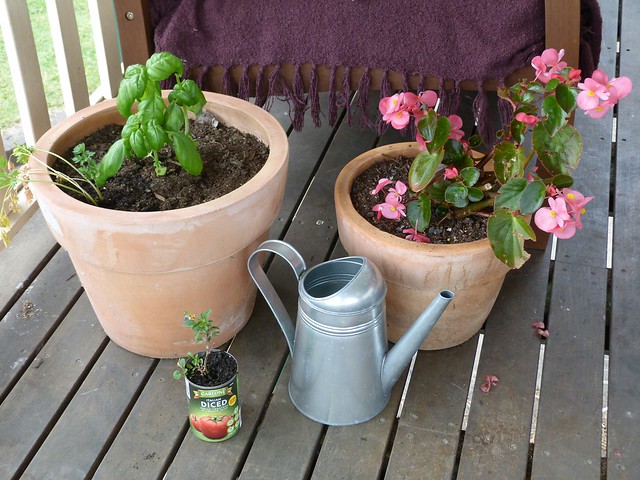
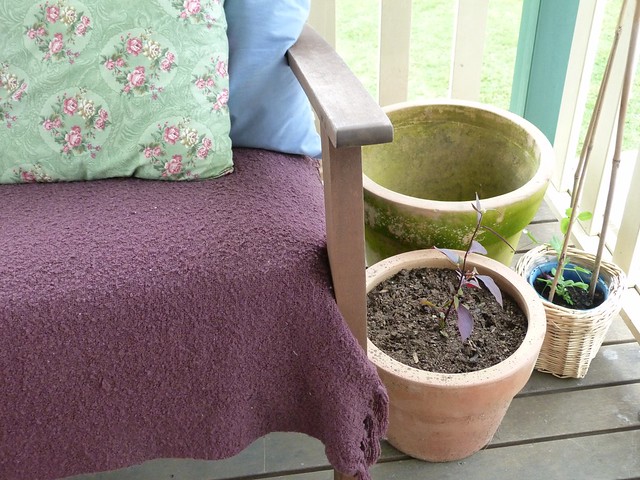
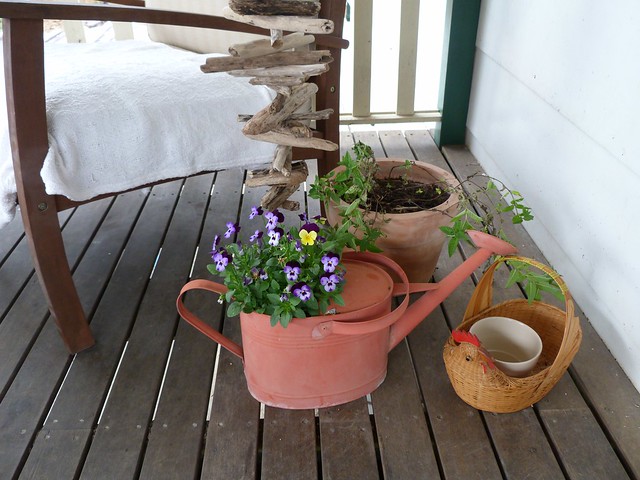
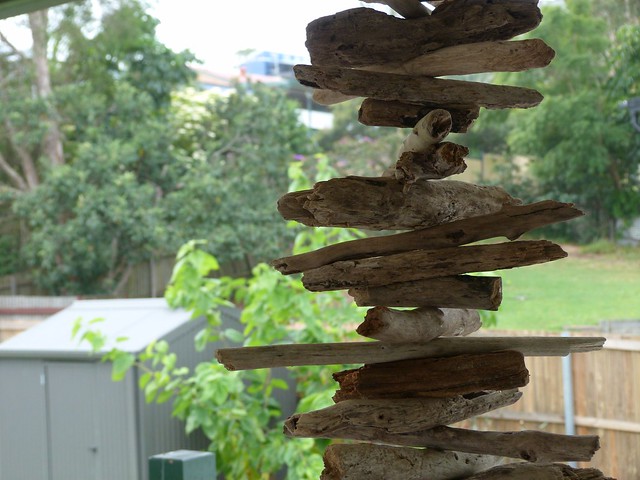
I started by giving the chair covers a good soak and wash. I raided the linen closet for throws, tablecloths and spare cushions to throw on the couches. I gathered up spare pots from the shed and garden. The plants are mostly self sown seedlings and cuttings from the garden. I grabbed some tea light holders from my bedroom and made a driftwood mobile with sticks collected from our holiday at Yamba (a beautiful reminder for us). I came home from Ikea one day with a handy watering can, a tray that caught my eye and a few 99 cent pots. The chicken basket and woven planter are both op-shop finds. 

A few more plants and cushions, a few more op-shopped finds, and this comfy little space will feel even more homely. Simple, sweet and practical. And while Country Style won't be rushing over to photograph this space, I'm loving it. Now on to the front deck...

Tuesday, May 28, 2013

Ta-dah! Our new kitchen

Before
+
After
+
+
+
+
+
+
+

+
+
+
+

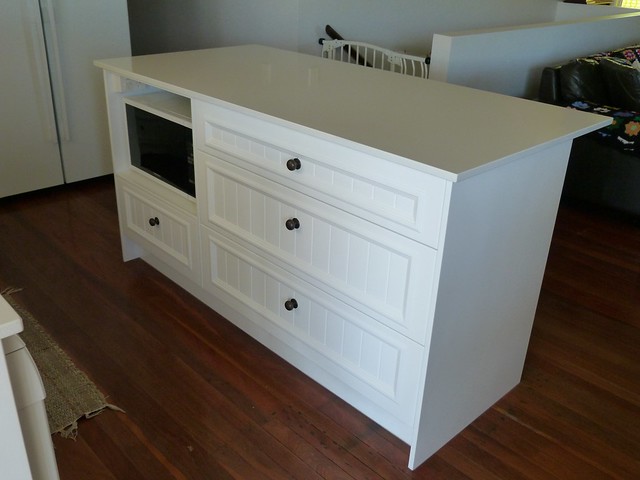
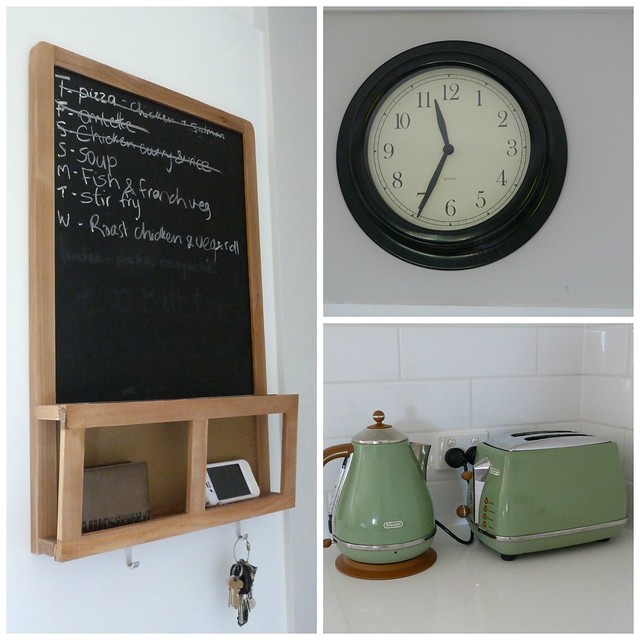
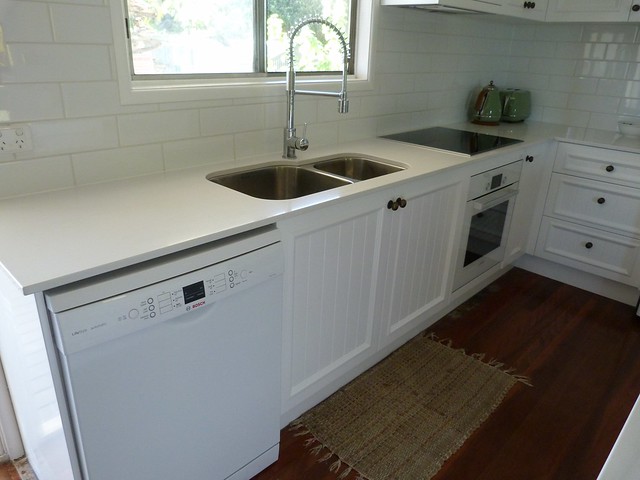
As promised, photos of our new kitchen! A new light fitting or two, a blind, a few stools and our kitchen will be 'done'. But I think we are close enough to calling it finished that I couldn't resist sharing the before and afters. 

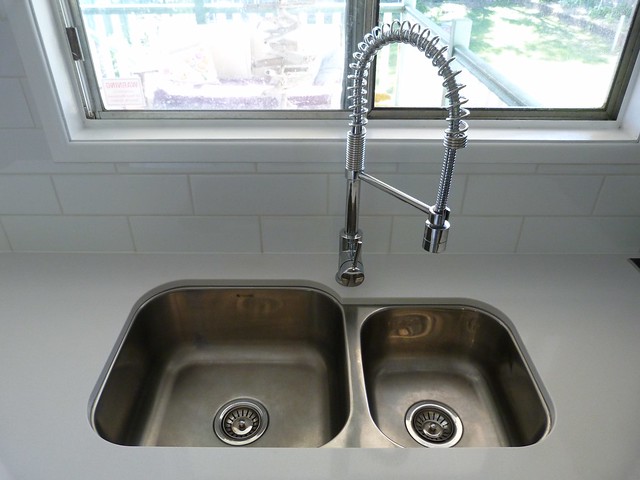
I am really loving our new kitchen. It came together just as I imagined and is such a lovely place to work. We looked at several options and decided on a custom built kitchen with routed, painted doors, white appliances and white stone bench tops. Dave was a little concerned with how an all white kitchen would look. It has long been a dream of mine and thankfully he trusted my judgement, as now he loves it. He put his own stamp on it by way of choosing the sink and tap wear, as he works in the plumbing industry. (Both pieces seemed enormous until they were in the space! Now I am loving the large double bowl sink and the tap wear.) 

How far our house has come in the almost two years we have called it home. It feels like it is really all coming together now that the kitchen is (almost) complete.

Home sweet home.

Monday, May 27, 2013

Leave your link!

Modcloth dress. Check. Handmade beads. Check. Punk concert for friends birthday... On my way.

Hello lovely readers! Thanks for visiting! Today I was hoping we could turn the tables a little and rather than a post about me, I'd love it if you could leave a link in the linkup below. If you have a blog, a Facebook page or an instagram account, please leave a link below. You might regularly leave comments, you might happily lurk, or this might be your first visit, whatever the case, I'd love to know a little more about my readers and be able to pop over and say hello. A readers list, if you will. It will also give my like minded readers a chance to meet. I'll leave the link up open for a week. I'm looking forward to being able to put names to the statistics I see in my blog dashboard. Thank you in advance!


Sunday, May 26, 2013

21/52

+
+

"A portrait of my children, once a week, every week, in 2013." Che and Fidel.

Cohen: Lego in the morning sun.
Emerson: She climbs on to the dining chairs in order to play with the contents of the table.


I have been feeling a weight that I couldn't shift recently. An annoyance, I am sorrry to say, at my beautiful children and the phases they are going through that I am finding difficult. Four year old Cohen, who is mastering lying and argues like a politician, and stole for the first time this week. One year old Emerson, who has taken to throwing tantrums and intentionally hitting her head, whose bruised forehead is an unwelcome reminder. I was finding it really difficult to shake the lingering frustration, as the difficult behaviors were repeated. As I struggled with these issues, I remembered a piece of advice I had once read with regards to mothering. 'Just love them.' It suddenly held new meaning. For while I love them and always will, hearts of my heart, bodies from my body, in order to let go of my frustrations I needed to remind myself to just love them and let the negative feelings go. It has become my mantra this past week and I have been able to be more patient and more imaginative in finding solutions. 

As I have reminded myself to just love them, so I have reminded myself to just enjoy them. To stop what I am doing and just play with them, not just wait until I have finished my task. To be silly and make up rhymes when we are driving. To stop trying to get things done quickly and hand the reins over to them instead. To involve them and remember that the little things I take for granted are new and fascinating for them. 

Grocery shopping can feel like a tedious chore at times, but for Cohen it is an outing filled with many new possibilities, if only I am open to them. If I slow down and take time I am inspired to give Cohen the coin and the opportunity to get the shopping trolley, to point out each object we need and encourage him to put them in the trolley, to show him how to tear a plastic bag off the roll and fill it with fruit then allow him to do the rest, to hand him my car keys and explain how to turn it in the lock to unlock the door and congratulate him when he manages it.

They are only little for so long.

-

Two of my favourites from last week - Thrifty Gifty and Picking Wild Mountain Berries

Saturday, May 25, 2013

Stitch. Read. Covet. Blog.

I'm running a little late today after a late night last night, early morning soccer-mothering and a day spent with my family. Today though I am celebrate bloggers and the insight, skills and inspiration they have to offer.

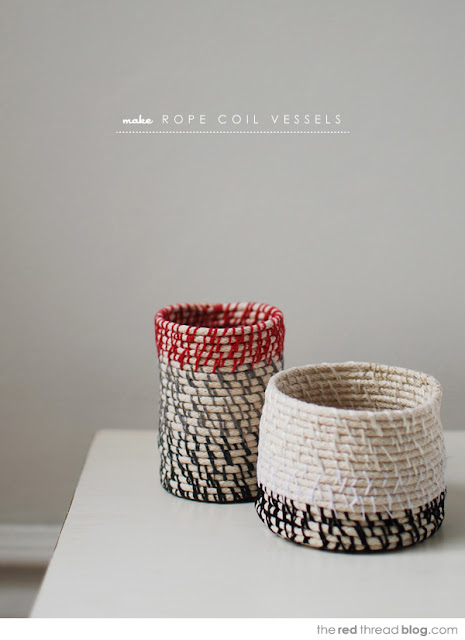
Stitch: Oh my. I just love these stitched rope baskets. They have made their way to the top of my to make list. So many possibilities. Yet another wonderful the read thread tutorial. The paper patchwork art and coil bowls are also fantastic. This entire blog is a visual feast and a constant surprise.


Read: If, like myself, you are interested in simple living, a move towards self sufficiency, making your own laundry liquid and growing your own vegetables, Rhonda Hetzel's book will long be a valuable reference in your library. Written with a gentle, Grandmotherly tone, Rhonda imparts her wisdom in an inspiring and achievable way. My Stitch. Read. Covet. Blog. series would hardly be complete if I did not include this volume. Rhonda's blog is also a beacon of simple living advice and inspiration.


Covet: Two of my long time favourite bloggers, Paravent and Belinda Marshall, are currently on the other side of the world, undertaking Camilla Engman's ACE Camp. What's not to covet about six days in a studio learning with a wonderful artist, in Gothenburg, Sweeden?! After contributing to Belinda's successful Pozzible campaign, I am closely following the instagram feeds of both these lovely ladies and living vicariously though them. Though I am not at point in my life where I could hop on a plane and undertake such an experience, it is a joy to have them share their travels with us. To find out more check out their blogs and follow their instagram feeds - @paravent and @belindajmarshall


Blog: Many crafters would need no introduction to Yardage Design, or the lovely Nic, designer and print maker behind the label. I've admired (and been purchasing from) Nic for a few years now. There is nothing quite like hand printed linen! This week I was fortunate enough to meet her in person, at Thea and Sami's morning tea. It reminded me again of all the wonderful things that blogging has brought in to my life. Nicole's blog and instagram feed (@yardagedesign) are creative journals of her work, loves and travels, and will have you itching to try your hand at screen printing, have you dusting off your sewing machine, or investing in a macro lens.

-

So dear readers, what have you been stitching, reading, coveting or blog-loving lately? Leave a comment below so we can share in the goodness.

Wednesday, May 22, 2013

Learning the hard way...

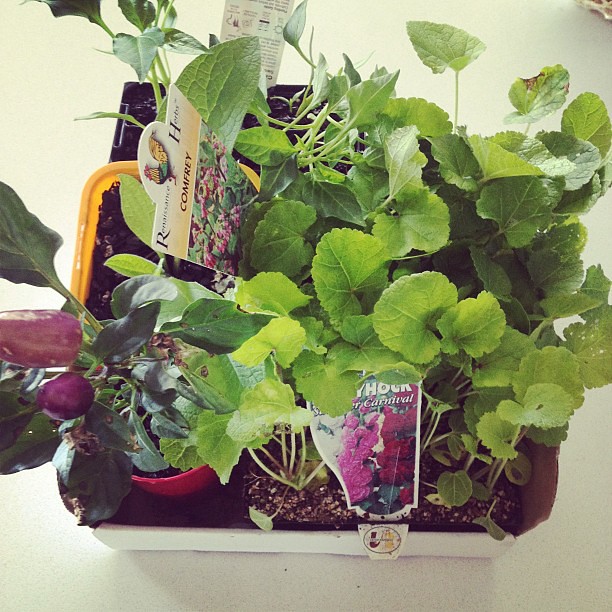
A morning outing to the library, nursery and duck pond. Oh how I have missed being able to drive. Hollyhocks, capsicum, rainbow chilli and comfrey. The number of ducks at the lake has doubled. Escaping the colder weather down South, I wonder?
New post on the blog. Learning the hard way... #christinalowrydesigns #blogpost

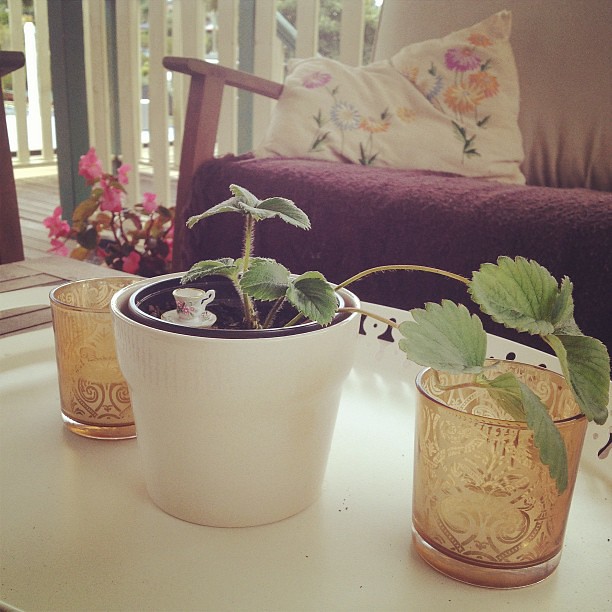
Cohen stood by my side, Emerson in the sling, as I emptied the plants from our basket at the nursery yesterday. My phone rang, and I answered it by reflex, as the nursery woman began to serve us. I really should have waited a moment, finished the transaction and called back. I know. I usually do. I'm not sure why I didn't. But I made arrangements to meet friends at the duck pond as the woman entered our plants in the til and Cohen discovered the small $1 pot plant ornaments on the counter. I added a tiny tea cup to our total and nodded in agreement when Cohen held up a small green frog. I paid and thanked the nursery lady, phone still to ear I'm ashamed to say - incredibly rude I know - and ushered Cohen to the car. As he climbed in to his seat I strapped Emerson in to hers. Triumphantly, Cohen held up his little frog and told me how wonderful it was, then held up a small lady beetle ornament and told me how equally wonderful it was. Taken aback, brain not quite in gear, I asked where he had gotten it? After a pause, in which his four year old brain must have been working furiously, he simply informed me that he had liked it. 
"Did you take that beetle without paying for it Cohen?"
"No, I just liked it."

Thus began a conversation that was revisited throughout the day. It's wrong to take things that don't belong to us. When we take things and don't pay for them that is called stealing. Stealing is even worse than breaking a rule, it is breaking the law. I will always love you, no matter what, but I am feeling disappointed.  Beetle in hand, children in car, car thankfully parked alongside the entrance, rather than publicly shaming him, I returned to the counter and replaced the beetle. Shame faced myself, I explained what had happened. The nursery woman smiled, assured me it was not a problem and admitted that she thought he had taken one. An even brighter shade of red, I returned to the car and picked up the thread of our conversation once more.

Oh, the lessons we learn. I'm still a little shocked. My sweet baby is now a little boy, a little boy who is testing his limits, exploring the world and not always making the right choices. And as I try to guide him, I am learning lessons too, and not always making the right choices. 

Next time, I'll let the phone ring. 

Tuesday, May 21, 2013

A guest post and a giveaway

Morning tea

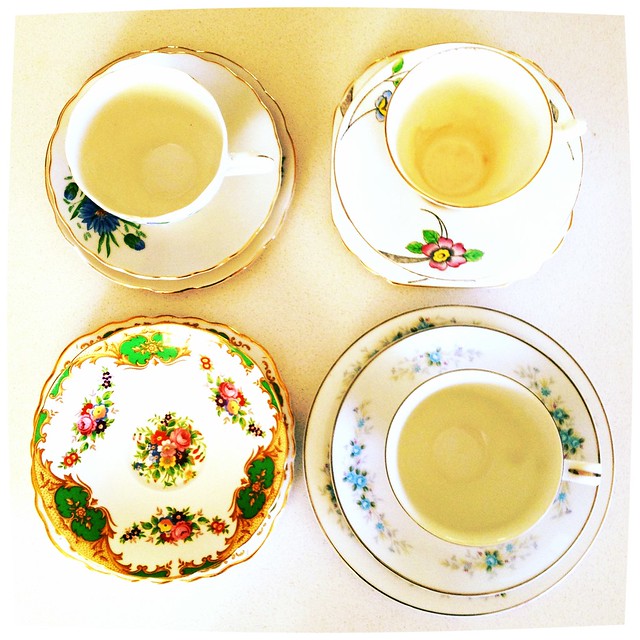
Care to join me for a cuppa and a trip down memory lane? Pop over to the Typically Red blog to read my guest post, as part of A Very Bloggy Morning Tea. While you are there, make yourself at home, have a wander around and enter the wonderful giveaway Greer is holding too. A set of my Afternoon Tea beads are just one of the many prizes.

Monday, May 20, 2013

Ten things I have learnt about making jam

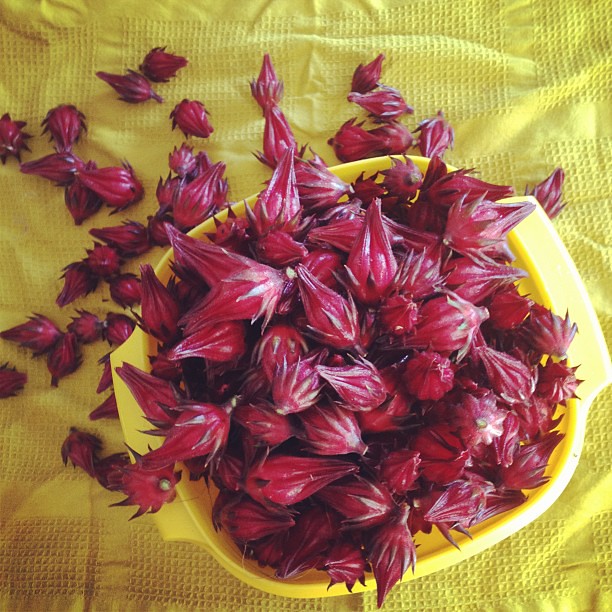
And then there was jam. Lots of jam. Thanks for your help! @_chrane_ #rosellas #homemade
First Rosella harvest! Time to make jam... Fingers crossed. #veggiepatch #rosellafruit #jamintentions
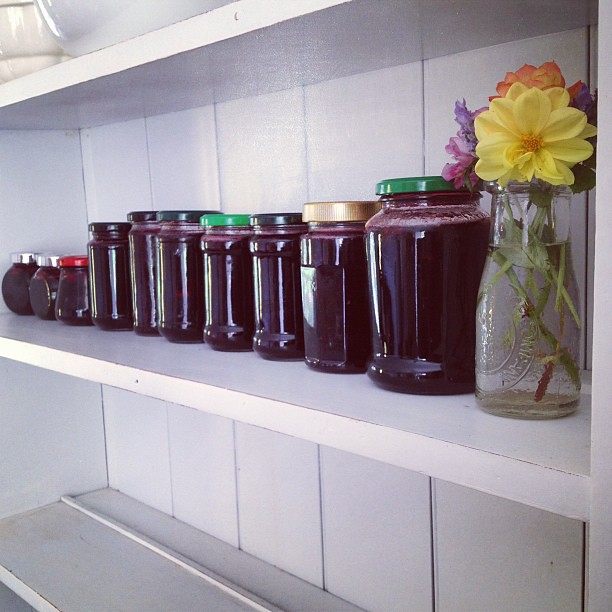
Possibly the last batch of Rosella jam for the season. These five, and the six in the store cupboard, should last us until jam making time next year. :) #rosellas #jam #homegrown #selfsufficiency

This list was inspired by Mama Shara, who asked for more info after seeing the image above in my instagram feed. She has shied away from making jam in the past, assuming she would need canning jars or specilised equipment, but with a Mulberry tree in her backyard I think she will have everything she needs. Hopefully this post will give her, and others thinking about trying their hand at jam, a gentle nudge. Nothing tastes better than homemade jam. The satisfaction of making a single jar, or a whole years worth, is a wonderful feeling indeed.

You already have all that you need to make jam. When I first made jam I too thought I would need specialised equipment to make it. I went and brought jars and scales, and thought I would wing it with what I had until I could afford to buy jar tongs, thermometers and the like. Now I know better. If you have any or all of those things, great, use them. If not, don't worry, nearly every kitchen already has what you need to make jam. A stock pot, a wooden spoon, a knife, a saucer, kitchen tongs and some empty jars. And while I love the look of matching Mason jars all in a row like something from a magazine, part of making jam for me is about being thrifty and recycling. So, I save up our old jars - olives, ginger, pickled onions, whatever we bring in to the house - and use them.

Cleaning jars is simple. You don't even have to take the labels off if you don't want to. To make sure the jars are sanitized you can pop them in the dishwasher while you are making your jam, then spoon the finished jam in to the still warm jars. You can boil the jars in a big saucepan. Or you can wash them by hand and pop them in a low oven until you are ready to use them. You just want clean jars so that you can store your jam for up to a year without it spoiling. And you don't want to put hot jam in a cold glass jar, just in case it cracks. (I'm yet to have this happen to me. But why risk it?)

Pectin is to jam what gelatin is to jelly. Reading about jam and words like 'pectin' and 'gelling temperature' scared me off jam making for awhile. I wasn't confidant about my kitchen skills. And while making jam will make you feel like a domestic goddess, anyone that can cut fruit and boil water can make jam. It's true! And the more jam you make the better you will get at it. All you need to know is that pectin helps jam set. Not enough pectin, is like not enough gelatin, it just won't set. Any jam recipe you look at though will tell you what to put in to get it to set. Rosellas have pectin in their seeds, so you simmer them in water, chuck out the seeds and use that water to make your jam. Isn't Mother Nature wonderful? Strawberries have their own pectin in them too. And gelling temperature? That's just how hot the jam needs to get for it to set. Like making jelly, the gelatin needs to dissolve so the jelly sets. Cold water and gelatin won't make jelly. Do you need to know what temperature the jam needs to be for the sugar to dissolve? Nope, you can tell by looking, or dipping in your spoon and running your finger over the spoon and feeling for the little grains. Do you need to know the precise temperature that jam sets at? Nope. Just use a cold saucer.

The saucer trick works. Yes, a saucer or plate popped in the freezer is all you need to test if your jam is ready. It's hard to tell just by looking at a boiling saucepan of jam if it is going to have the right consistency once it is cool, so cool a few drops. Dip your wooden spoon in and drip a few drops on your cold plate. If the drops cool and stay runny, you need to boil your mixture for longer. If you can push your finger nail through the drips and they wrinkle up, and look jam-like, it's ready. Don't worry if you have to test a few times. Pop the plate back in the freezer, give it another five or ten minutes and try again. 

You can fix your mistakes. Short of burning the jam (which you will smell!), you can fix the problems you may face when making jam. Jam didn't set? Boil it a little longer. Jam set too thick? Stir though some apple juice to get it to the right consistency. Jam is more forgiving than you may think. If in doubt, google is your friend. Jam makers love giving advice - see above and below. :) Rhonda is a fountain of information.

Homegrown makes sense. Making jam from store brought fruit is great. You can choose whatever you want buy. Strawberries can be quite cheap in season. You can make your own mixes too - say a punnet of raspberries, strawberries and apple. But, to make jam that is more economical and free of pesticides or chemicals, you really need to grow your own fruit, or have family, friends or neighbours who will share their produce with you. What could be better than homegrown? We are lucky enough to have neighbours with a mandarin tree who hand plastic bags full of fruit over the fence. Another friend shares the fruits from her prolific lemon tree. My sisters Mother in Law has a big, beautiful Mulberry tree, lemon and orange trees and sends my sister home with big bowls and bags of fruit, knowing I love to make jam.

I had grand visions of growing enough strawberries to make jam. My little ones had small visions of daily snacks in the garden. No jam was forthcoming. Instead I planted Gooseberry, Rosellas and a Mulberry tree. I believe I would probably have to devote half my yard to strawberry plants in order to grow enough to make a years worth of jam. But three Rosella bushes, which take up a couple of meters each, produced more than enough fruit to preserve a years worth of jam, and more to share. Come September my two year old Mulberry should be producing enough fruit for me to preserve and freeze too. You can also use frozen fruit. If on't have time to make the jam right away, but have a tree full of fruit, or don't have enough fruit to make jam yet, freeze the fruit and make jam when you have a bit of time.

Only fill the stock pot half way! If you have a lot of fruit you will need to cook it in batches. Jam bubbles up like crazy when it is on the boil, and sticky jam all over your stove is not a great look. It also helps keep your ratios right if you cook it in batches of about three cups of fruit. And remember how I said you don't need scales? The basic rule of jam is one cup of fruit to one cup of sugar. Instead of weighing your fruit and sugar, just use a measuring cup. If you have two and a half cups of fruit, use two and a half cups of sugar.

Your stock pot is your water bath. If you make one or two jars of jam, pop them in the fridge and use them. If you make several pots of jam, in order to ensure there are no germs in you jars that will spoil the contents over time, you need to pop the jars in to a stock pot (or the biggest pot your own) of boiling water and leave them in there for up to two hours (it will take up to an hour for the boiling water to return to the boil depending on the size of the pot and the number of the jars, then you want your jars to sit in the boiling water for about an hour. If the pot is not large enough to allow an inch of water over the top of the jars don't worry, you can turn the jar upside down and just process them for a bit longer. I tend to use those jars up first though, just in case. Rhonda talks about this too, here.

Filling the jars. You can buy fancy wide mouth funnels to make filling your jars easier and less messy. Or, like me, you can cut the bottom off a cheap kitchen funnel from your local supermarket. Or use a measuring cup with a lip, scoop up the jam and pour it in. Wipe the mouth of the jar before you put the lid on if any has spilled.

Kitchen tongs make good bottle tongs. Again, you can buy specilised bottle tongs to pick up your hot jars of jam out of the boiling water, or you can use your good old kitchen tongs and pick up the bottle by the lid and pop a tea towel under it to hold it and move it to where you want it to cool.

-

I hope that the information above has given you the confidence to give it a go and turn seasonal fruit in to a year long treat. Any questions, please feel free to ask in the comment. Fellow jam makers, please feel free to leave any tips, advice or recipes of your own in the comments section too!
Sunday, May 19, 2013

20/52

52\
52
+
+
52
52
52
52
"A portrait of my children, once a week, every week, in 2013." Che and Fidel.


Cohen: He has had a runny nose these past few days and has been all about cuddles, sleep and comfort.
Emerson: She has been teething again this week and has been all about cuddles, sleeplessness and comfort.

I'm cheating, more than a little this week, with multiple photos. While my little monkeys were playing on this big blue chair I picked up my camera in an attempt to snap their portraits. While I did capture them individuallye, the photos that really spoke to me were the ones where they were playing together, so relaxed and at ease in each others company, with so much love for each other. Makes a Mamas heart fit to burst.

-

Two of my favourites from last week were - Ruby Hoppen and Lamb Loves Fox.

Saturday, May 18, 2013

Stitch. Read. Covet. Blog.


Stitch: I love these wings so much that I would wear them myself - to a costume party, of course... They are on my list on things to make for my little people too. You can find a free pattern here.


Read: The latest addition to my book shelf is this volume of inspiration and beauty, A Place Called Home. With practical styling ideas and advice like, "Paint your front door a bold colour that calls 'hello!', I recommend keeping your eye out for this beautiful book by Mr Jason Grant. I am thinking our door would look great painted red. Does your door say 'hello!'?


Covet: I can see these Ouchflower tassels in my house. I love them. Yes yes, I covet them. Even just one of them would be a sweet and unique addition to a room, yes? (Or better yet, twins!)
*Family, please note the addition of these to my birthday wishlist. Thank you in advance.


Blog: There are some blogs I follow that I pop in and visit from time to time, and other blogs that I click straight to whenever I see a post in my reader. Ivy Nest is such a blog for me. Tania's blog is a beautiful, humble slice of domestic loveliness. As you scroll through her posts you can well imagine the scents of baking bread, homegrown roses, and fresh linen on the clothes line. Tania writes with a real genuineness and welcoming tone, to the extent that I often feel as if I have been invited in and taken my place along side her, knitting in hand, as we chat about our children, veggie patches and baking. Ivy Nest is a collection of memorable moments, creative projects, garden journal and honest musings, supported in no small way by Tania's eye for colour and design, and her know-how with a camera. If you haven't stumbled across Tania's blog yet, you are in for a delight.

-

So dear readers, what have you been stitching, reading, coveting or blog-loving lately? Leave a comment below so we can share in the goodness.

Friday, May 17, 2013

Recognising happiness


L - R: firsts from the garden - beans, chilli and purple carrots; recycling an old watering can; 
a new discovery; windows stacked like so many books on a book shelf;
those few moments when the whole house is clean; thrifted treasure

Life is good. So very good. I feel that I have left illness and struggles behind me, and my gratitude list gets longer and longer. It's a wonderful place to be. Of course I am mindful that 'this too shall pass.' But it is lovely to stop in the moment and feel that all is right with our little world. Perfectly imperfect, but perfectly lovely. (Complete with teething one year old and runny nosed four year old.)

I want to thank you all for taking the time to read and comment on this blog of mine. I'm so pleased to share this journey with you. I seem to have an idea of what this blog is, then it pleasantly surprises me again and I find that it is something else - as inconstant and evolving as I am. Mama blogger? Craft blogger? Business blog? All and more. Whether parenting, crafting, creating jewellery, knitting, gardening - I bring my creative self to all these tasks. I guess Creative Blog sums it up best then? 

Creativity is something that we recognise and connect with in each other. This community has, and continues to, encourage and inspire me. I'm looking forward to meeting members of the blogging community at Thea & Sami's Morning Tea next week in Brisbane. (I believe there are still places available.) I'm also looking forward to my first guest post being published on one of my favourite blogs soon, accompanied by a giveaway.

An update on my eyes for those who have followed along as I went from surprise diagnosis of two severe retinal detachments, to surgeries and on to recovery. I drove today for the first time in three months! (With my optometrists approval.) With glasses the vision in my right eye is very, very good. Unfortunately the damage done to my left eye was not completely repairable and my right eye is going to have to do most of the work, while my left eye offers a little peripheral assistance. It's been a little difficult to mentally adjust to this change, though my right eye does a fantastic job of compensating for my left. I feel incredibly lucky that I was able to have the treatment I received and save the vision in my right eye. Modern medicine is a marvel.

Thank you again for your support of my little shop and my Mother's Day shop update. There was a time when I couldn't picture myself ever returning to the jewellery bench to work. Now I love the creative freedom of working from home and being a stay at home Mother. My blog provided me with a place to share my work and receive feed back, which lead to the opening of my shop. In a couple of months my shop will be turning three! I'm pleased to say that half of the pieces in the Mother's Day update have sold and I am currently in the process of designing and working on a collection of brooches for my next update.

All these things I could not accomplish on my own. So thank you.
Life is good. 
Related Posts Plugin for WordPress, Blogger...